


Mautic 5 introduces a new, Composer-first way of managing installations and dependencies. In this guide, we’ll walk through a fresh installation of Mautic 5 on Ubuntu 22.04 using Composer. This approach simplifies project management and makes updates and package integration more efficient. Whether you’re a seasoned Mautic user or setting up for the first time, this comprehensive guide ensures a smooth Mautic 5 deployment.
How to Install Mautic 5
To begin our installation, it’s important to recognize that utilizing Composer for deploying Mautic provides the simplest and most straightforward way to upgrade Mautic down the line. The installation process will occur in several phases.
Phrase #1: Preparing The Environment & Requirements
For us to start, we need :
- A clean Ubuntu 22.04 or 24.04 LTS server.
- You are logged in as the root user or with sudo privileges.
- Your server has a fully qualified domain name (e.g.,
server.yourdomain.com). - A minimum of 1GB RAM (2GB or more recommended for better performance
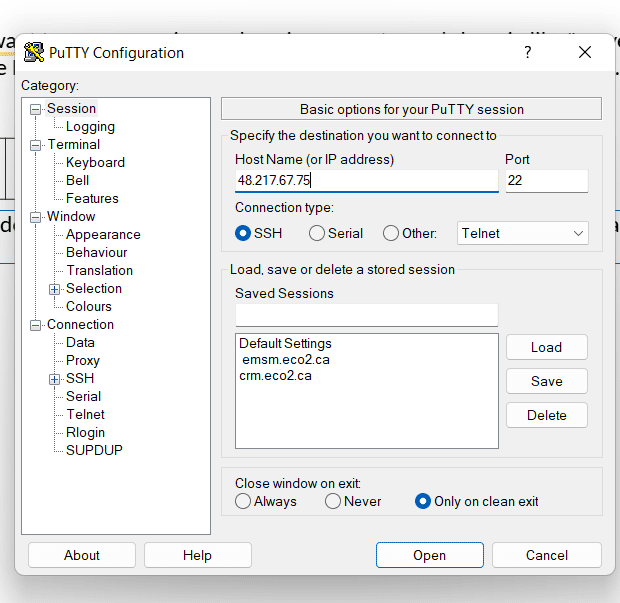
Once these are ready, point your domain name to your VPS server IP and launch your SSH. If you don’t know how to set DNS records, read this article on DNS settings and management. In this post, I will be using Putty, an open-source SSH client. Let’s connect to our server and set up TimeZone first.
Run this command to set he timezone;
sudo dpkg-reconfigure tzdataInstall Prerequisites
Here we are going to install PHP8.1, but before that, we have to update and upgrade the VPS server. Run the followinging codes one after the other to get all done
apt update && apt upgrade -y
apt install software-properties-common
add-apt-repository ppa:ondrej/php
add-apt-repository ppa:ondrej/apache2
apt update && apt upgrade -y
Install required packages
In the previous step, we installed a basic version of PHP. Now, we’ll enhance it by adding essential extensions to enable important features like ZIP compression, IMAP for reading emails, and more. Additionally, we’ll install the Apache web server and MariaDB to handle our web hosting and MySQL database requirements.
sudo apt install apache2 mariadb-server libapache2-mod-php8.1 php8.1 php8.1-{xml,mysql,imap,zip,intl,curl,gd,mbstring,bcmath} -yConfigure Apache For Mautic
Next, we need to configure our web server to recognize Mautic when accessed via the correct domain. To do this, we’ll create a new Apache site configuration file named site.conf.
Run the following command to open the configuration file for editing:
sudo nano /etc/apache2/sites-available/site.confCopy and paste the configuration content provided below into the file. Be sure to replace the highlighted parts with your actual domain name and the path to your Mautic root directory.
Before moving on, let’s pause to point out an important detail: if you’re coming from Mautic 4, you’ll notice that in Mautic 5, the public-facing files are now located one level deeper — inside the docroot directory. This is not a mistake. The file structure has changed in Mautic 5, and this adjustment helps improve security and organization.
<VirtualHost *:80>
    ServerAdmin admin@yoursite.com
    DocumentRoot /var/www/html/mautic/docroot
    ServerName yoursite.com
    ServerAlias www.yoursite.com

    <Directory /var/www/html/mautic/docroot>
        Options +FollowSymlinks
        AllowOverride All
        Require all granted
    </Directory>

    ErrorLog ${APACHE_LOG_DIR}/error.log
    CustomLog ${APACHE_LOG_DIR}/access.log combined
</VirtualHost>
Create a symbolic link to enable the new site configuration and make it active.
sudo ln -s /etc/apache2/sites-available/site.conf /etc/apache2/sites-enableadd sSL
sudo add-apt-repository ppa:certbot/certbot
apt update && apt upgrade -y
sudo apt-get install python3-certbot-apache
Start the Certbot setup process to enable HTTPS for your domain:
certbot --apache -d subdomain.yourdomain.comAfter configuring the VirtualHost as shown earlier, activate it by running the following commands:
a2enmod php8.1
a2enmod rewrite
Great! Apache is installed, configured, and running with PHP 8.1. We’re almost there. However, since Mautic can be a bit particular (yes, we’re looking at you, Mautic), we need to make a few adjustments to the PHP configuration to meet its requirements.
Adjust PHP Settings
Open the PHP configuration file for editing:
sudo nano /etc/php/8.1/apache2/php.iniSome of these values might already be correctly set, but it’s important to double-check and update them as needed.
If you’d rather not scroll through and edit line by line, here’s a time-saving tip: use the sed command below to apply the required changes quickly. It will search for the existing values and replace them with the appropriate settings—no manual editing required. Just copy and paste:
sed -i 's/allow_url_fopen = Off/allow_url_fopen = On/' /etc/php/8.1/apache2/php.ini
sed -i 's/memory_limit = 128M/memory_limit = 512M/' /etc/php/8.1/apache2/php.ini
sed -i 's/upload_max_filesize = 2M/upload_max_filesize = 200M/' /etc/php/8.1/apache2/php.ini
sed -i 's/max_execution_time = 30/max_execution_time = 300/' /etc/php/8.1/apache2/php.ini
sed -i 's/post_max_size = 8M/post_max_size = 64M/' /etc/php/8.1/apache2/php.ini
You should also configure your timezone to ensure PHP runs correctly.
Set Your Timezone
Open the PHP configuration file:
sudo nano /etc/php/8.1/apache2/php.iniPress CTRL + W to search within the file, then type:
date.timezoneAdd your desired timezone using one from the official list:
Example:
date.timezone = Europe/BudapestOnce done, save and exit by pressing CTRL + X, then Y followed by Enter.
Restart Apache
To apply all changes, restart the Apache service:
sudo systemctl restart apache2.serviceAnd that’s it—your environment is now properly configured and timezone-aware!
Looks like you’re eager to learn—great! Below are some helpful commands to manage the Apache2 service:
Manage Apache2 Service
sudo systemctl stop apache2.service   # Stop Apache
sudo systemctl start apache2.service  # Start Apache
sudo systemctl enable apache2.service # Enable Apache to start on boot
Set Up the Database
Earlier, we installed MariaDB. Now it’s time to secure the installation.
Run the following command:
sudo mysql_secure_installationWhen prompted, use the answers below:
- Enter current password for root (enter for none): Press Enter
- Set root password? [Y/n]:
Y - New password: Enter a strong password
- Re-enter new password: Repeat the password
- Remove anonymous users? [Y/n]:
Y - Disallow root login remotely? [Y/n]:
Y - Remove test database and access to it? [Y/n]:
Y - Reload privilege tables now? [Y/n]:
Y
Manage MariaDB Service
Here’s how you can start and stop the MariaDB server:
sudo systemctl stop mariadb.service   # Stop MariaDB
sudo systemctl start mariadb.service  # Start MariaDB
Create a New Database
At this point, we have the MariaDB engine ready, but we still need to create an actual database for Mautic. Let’s create an empty one in the next step.
Create the Mautic Database and User
Let’s set up the database for Mautic by logging into the MariaDB server:
sudo mysqlOnce inside the MySQL prompt, run the following commands:
- Create the database:
CREATE DATABASE mauticdb;- Create a dedicated user for this database
(ReplaceYOURPASSwith a secure password of your choice—don’t use your root password):
CREATE USER 'mauticuser'@'localhost' IDENTIFIED BY 'YOURPASS';- Grant the user full access to the Mautic database:
GRANT ALL ON mauticdb.* TO 'mauticuser'@'localhost' IDENTIFIED BY 'YOURPASS' WITH GRANT OPTION;- Apply the changes and exit:
FLUSH PRIVILEGES;
EXIT;
That’s it—your database and user are now ready for Mautic to use. Be sure to save the database name, username, and password somewhere secure—you’ll need them during the Mautic installation.
Phrase #2: Package Managers
This section is short for now, but it’s important. As your project grows, you’ll find that keeping package managers organized is essential for smooth maintenance. We’ll expand on this topic later as we dive deeper into managing Mautic efficiently.
You might think this step is unnecessary, but trust me once you get used to package managers, it’s like discovering the TV remote for the first time. No more switching channels manually. (What? You’ve never done that? Do not make me feel old.)
Install NPM
You may be wondering:
“Wait, NPM? Since when does Mautic use that?”
Yes, it’s a relatively new addition and it’s a good one. NPM will help manage JavaScript-related packages within your Mautic project.
“But I already have Composer. Why do I need NPM too?”
Let’s keep it simple: Composer handles PHP dependencies, and NPM handles JavaScript. Two package managers, two different jobs—both essential.
To install Node.js and NPM:
curl -fsSL https://deb.nodesource.com/setup_20.x | sudo -E bash -
sudo apt install -y nodejs
sudo apt install npm
Install Composer
Now let’s install Composer—the PHP package manager Mautic relies on.
sudo apt install composerThat’s it! Easy, right? Now you’ve got both package managers ready to handle whatever Mautic throws your way.
Phrase #3: Install Mautic
Now it’s time to install Mautic. We’ll create the project in the appropriate directory and use the latest stable version available at the time of writing—5.2.2.
Navigate to the web root and create your Mautic project:
cd /var/www/html
composer create-project mautic/recommended-project:5.2.2 mautic --no-interaction
cd mautic/docroot
Set Proper Permissions
Since we didn’t run the Composer command as the www-data user, we need to manually fix the file ownership and permissions to ensure everything works smoothly:
sudo chown -R www-data:www-data /var/www/html/mautic/
sudo chmod -R 755 /var/www/html/mautic/
Reload Apache
Let’s reload Apache to make sure it picks up the new files and configuration:
sudo service apache2 reloadLaunch the Mautic Setup Wizard
If everything went well, you’re probably feeling the excitement—like a kid on Christmas morning. Open your browser and go to your domain. You should now see the Mautic setup wizard.
If there are no warnings or errors (especially nothing in red), you’re good to go. Click Next Step to continue.
Use the database credentials you set up earlier (yes, the ones with YOURPASS) to fill in the required fields.
Create the Admin Account
At the final step, you’ll set up your Mautic admin account. Be sure to choose a strong password—starting with version 5.1, weak passwords like 123456 won’t cut it.
Take a moment to appreciate how far you’ve come—you now have a fully installed Mautic environment, ready for action!
Phrase #4: Add Your Email Transport
In earlier versions of Mautic, adding email functionality was relatively straightforward. In Mautic 5, it’s just a little more hands-on—but don’t worry. Since you installed Mautic using Composer, you’re officially a Composer Ninja, and adding new functionality like email transports is easier than ever.
Install an Email Transport Package
Head to your main Mautic project directory (not the docroot, but the root where Composer was run):
cd /var/www/html/mauticThis is your base location for installing any new packages (plugins are a separate topic we’ll cover later).
To add support for Amazon SES, for example, run:
composer require symfony/amazon-mailerAfter installation, reset file ownership and permissions:
sudo chown -R www-data:www-data /var/www/html/mautic/
sudo chmod -R 755 /var/www/html/mautic/
If you’re using a different email provider, you can browse the full list of supported mailers here:
🔗 Symfony Mailer Transports
Pretty great, right? Thanks to open source, Mautic now benefits from Symfony’s mailer ecosystem—no heavy lifting required.
A Note on Amazon SES and Bounce Management
If you’ve used Mautic with Amazon SES before, you’re probably familiar with the SNS-based bounce handling where Mautic automatically processes bounces and unsubscribes via an endpoint.
In Mautic 5, however, this feature isn’t fully functional yet. While the documentation suggests using:
https://mautic.example.com/mailer/callback…it currently doesn’t work as expected. The Amazon SES transport installed via Symfony doesn’t support feedback loop processing out of the box.
What does that mean?
Mautic will successfully send emails, but it won’t automatically process bounces or complaints via SNS.
Temporary Solution: Use a Bounce Inbox
Until the community extends Amazon SES support in Mautic 5, the recommended workaround is to manage bounces the traditional way—by fetching them from a dedicated bounce email inbox. At this point your Mautic is installed. Head over to your browser and enter your domain name or IP address to complete your configuration.
https://mautic.example.com/installYou may also like to read how to install cyberpanel on Ubuntu 20.04 operating system.
Phrase #5: Add Cron Jobs
Let’s talk about setting up your cron jobs in Mautic 5. The good news? If you’ve used Mautic 3 or 4, most of the commands will look familiar.
Core Cron Jobs
Segment Rebuilding
Still done the usual way:
php /var/www/html/mautic/bin/console mautic:segments:rebuildCampaign Management
No changes here either:
php /var/www/html/mautic/bin/console mautic:campaigns:update
php /var/www/html/mautic/bin/console mautic:campaigns:trigger
Parallel Campaign Execution (New Feature!)
You can now run multiple campaign threads simultaneously. This helps improve performance on higher-traffic sites.
Available options:
--thread-id=THREAD_ID: Unique ID for the specific process.--max-threads=MAX_THREADS: Maximum number of parallel threads to run.
Example:
php /var/www/html/mautic/bin/console mautic:campaigns:trigger --thread-id=1 --max-threads=4Importing Contacts
Still works the same:
php /var/www/html/mautic/bin/console mautic:importEmail Sending
Mautic now supports two sending methods:
- Immediate (default, no extra config needed)
- Queued (requires Redis setup)
For simplicity, we recommend using immediate sending, especially if you’re just starting out. Use this command for broadcast emails:
php /var/www/html/mautic/bin/console mautic:broadcast:sendSetting Up the Cron Jobs
To configure cron jobs for the www-data user (the typical web server user), run:
sudo crontab -u www-data -eIf prompted, select nano as your editor. Then paste the following cron job entries at the bottom of the file:
* * * * * php /var/www/html/mautic/bin/console mautic:broadcasts:send --limit=500
* * * * * php /var/www/html/mautic/bin/console mautic:campaigns:rebuild --batch-limit=100
* * * * * php /var/www/html/mautic/bin/console mautic:segment:update --batch-limit=900
* * * * * php /var/www/html/mautic/bin/console mautic:campaigns:trigger
* * * * * php /var/www/html/mautic/bin/console mautic:import --limit=500
* * * * * php /var/www/html/mautic/bin/console mautic:webhooks:process
* * * * * php /var/www/html/mautic/bin/console mautic:reports:scheduler
These are baseline cron jobs suited for a moderately sized installation (1–5k contacts). For performance tuning and scaling, consider checking out additional optimization guides.
That’s a Wrap!
Congratulations—you now have a solid Mautic 5 setup with scheduled background tasks to keep things running smoothly. 🎉
If you’ve got questions or want to dive deeper into performance tuning, feel free to reach out!
